Winter Minestrone

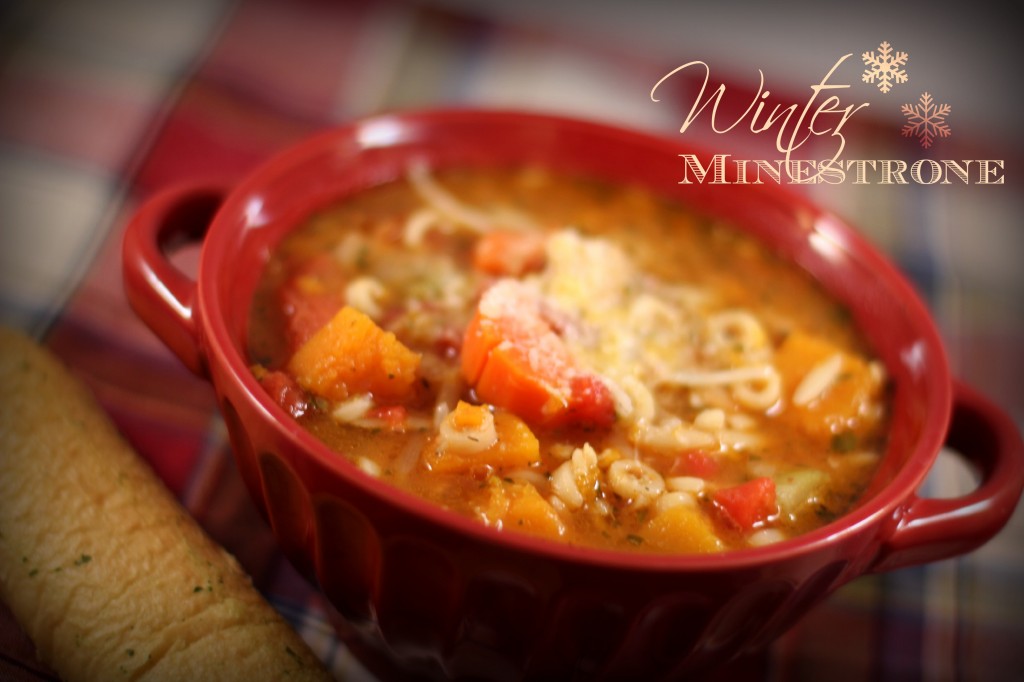
Last week, the weather report said that there was a blizzard coming — it turned out to be nothing more than a dusting of snow and a bit of strong wind.  The cold, dark, dreary, blustery day was the perfect opportunity to throw together a hearty winter minestrone soup.

The recipe I based this soup on is from the Barefoot Contessa.  I used different quantities and left out a few ingredients.  Spinach in soup just seems weird to me — but who knows.  🙂

It takes awhile to chop all of the veggies for this soup — and you’ll want to have your homemade chicken stock already prepared and on hand.  For a snowy evening at home, this soup is thick, rich, and satisfying.

I served it with breadsticks and fruit.  The kids wouldn’t touch it — they aren’t soup fans — but even Mike, the vegetable hater himself, ate a bowl — picking out the chunks.

Winter Minestrone
Author: 
Prep time: 
Cook time: 
Total time: 
Serves: 8
 
Ingredients
  • 2 Tbsp. olive oil
  • 4 ounces pancetta, diced
  • 1 medium yellow onion, chopped
  • 3 to 4 carrots, chopped
  • 2 stalks celery, chopped
  • 1 small butternut squash, diced
  • 1½ tablespoons minced garlic
  • 2 tsp. Thyme
  • 26 oz. can diced tomatoes
  • 6 cups chicken stock, preferably homemade
  • 1 bay leaf
  • salt and pepper to taste
  • 1 - 15 oz. can cannellini beans, drained and rinsed
  • 1 cup small pasta, I used orzo
  • ½ cup good dry white wine
  • 5 Tbsp. pesto sauce
  • Parmesan cheese, grated finely
Instructions
  1. Cook the pasta and set aside.
  2. In a dutch oven, heat the olive oil over medium heat. Add the pancetta and cook for 6 to 8 minutes until lightly browned. Add the onions, carrots, celery, squash, garlic, and thyme and cook over medium heat until the vegetables begin to soften.
  3. Add the tomatoes, chicken stock, bay leaf, salt, and pepper. Bring to a boil for 20 minutes or until the vegetables are tender.
  4. Discard the bay leaf. Add the beans and cooked pasta and allow to simmer until meal time. Stir in the white wine and pesto 5 minutes before serving. Dish into bowls and sprinkle with parmesan cheese and serve with warm bread.

 
Maybe you can enjoy this soup to reintroduce a few veggies after the massive eating that will take place over the next few days! I’ll be posting sporadically until after Christmas break, then I’ll hopefully be back to my three times a week posts. 🙂 Enjoy your holiday season!

Aunt Sally’s M&M Cookies

For me, it just isn’t Christmas without lots of baking and goodies.  Growing up, my mom and Aunt Sally would both bake like crazy during the Holiday season and on Christmas Eve there would always be a table filled with all types of treats.  I’ve always loved baking and I love sampling everything even more.  One of my goals it to carry on the tradition of making holiday goodies with my trio — we’ve got lots of recipes on our list this year!

Aunt Sally passed away when I was in high school, but her memory lives on.  This year, I knew that I needed to make a batch of her M & M cookies — they were always one of my favorite Christmas treats — so I asked my mom about the recipe and she swore it was on the M&M package.  Of course, the package I had didn’t have a recipe — so I Googled it and tried a batch, but they just weren’t right.  Finally, I wised up and messaged my cousin Kelly and low and behold, she had the recipe.   They are perfect.  They taste just like they did when I was little. I couldn’t be happier.

We made these yesterday afternoon and we all had a cookie (or four) after dinner.  Delish!

Aunt Sally's M & M Cookies
Author: 
Serves: 12
 
Ingredients
  • 1 cup shortening
  • 1 cup brown sugar firmly packed
  • ½ cup granulated sugar
  • 2 eggs
  • 2 tsp vanilla
  • 2¼ cups flour
  • 1 tsp baking soda
  • 1 tsp salt
  • 1½ cups M&M's
Instructions
  1. Preheat oven to 375 and line cookie sheets with parchment paper. In a stand mixer, cream shortnening, sugars, eggs, and vanilla thoroughly. Add dry ingredients gradually to creamed mixture, mixing well. Fold in ½ cup M&Ms, reserve remaining M&Ms for decorating. Drop by teaspoon (or melon baller) onto baking sheet. Decorate tops of cookies with remaining M&Ms - I do about 3 per cookie on top. Bake 10 to 12 mins or until golden brown. Makes 6 dozen 2½ in cookies.

Triple Lemon Cake {& Mike’s 36th Birthday}

Mike turned 36 on 12-12-12.  This was his 11th birthday we’ve spent together!  Unfortunately, the trio was sick that day (Bo had strep and they treated our whole family) but it did mean that Mike took the afternoon off and was home with us to spend part of the day.

Mike requested a lemon cake for his birthday, so I turned to Pinterest and found one to make from scratch.  I tackled this in the morning and it was challenging keeping sick little kiddos out of my cake batter — but for the most part I succeeded.

I make the ugliest cakes known to man.  I have zero cake decorating skills.  However, the cake did taste delicious.  I’d probably make the cake a bit differently if I had to do it again — it was slightly heavy — but the filling and icing for this cake were absolutely amazing!  The filling I could (and did) eat with a spoon.  Delicious!

Lemon Curd Filling
Author: 
Prep time: 
Cook time: 
Total time: 
Serves: 6
 
Ingredients
  • ¼ cup fresh lemon juice (about 1-2 lemons)
  • 2 tsp finely grated lemon zest
  • ⅓ cup sugar
  • 4 egg yolks
  • 3 tbsp butter
  • 1. Combine all ingredients in a double boiler (or in a metal bowl over a pot of simmering water, like I did).
  • 2. Heat while stirring constantly with a whisk.
  • 3. It is done when it’s thick enough to coat the back of a spoon. You will be able to tell it has thickened, but I wouldn’t say that it’s “thick.”
  • 4. Refrigerate until cool and thick.
Instructions
  1. Combine all ingredients in a small saucepan. Heat while stirring constantly until just boiling. Refrigerate until cool and thick.


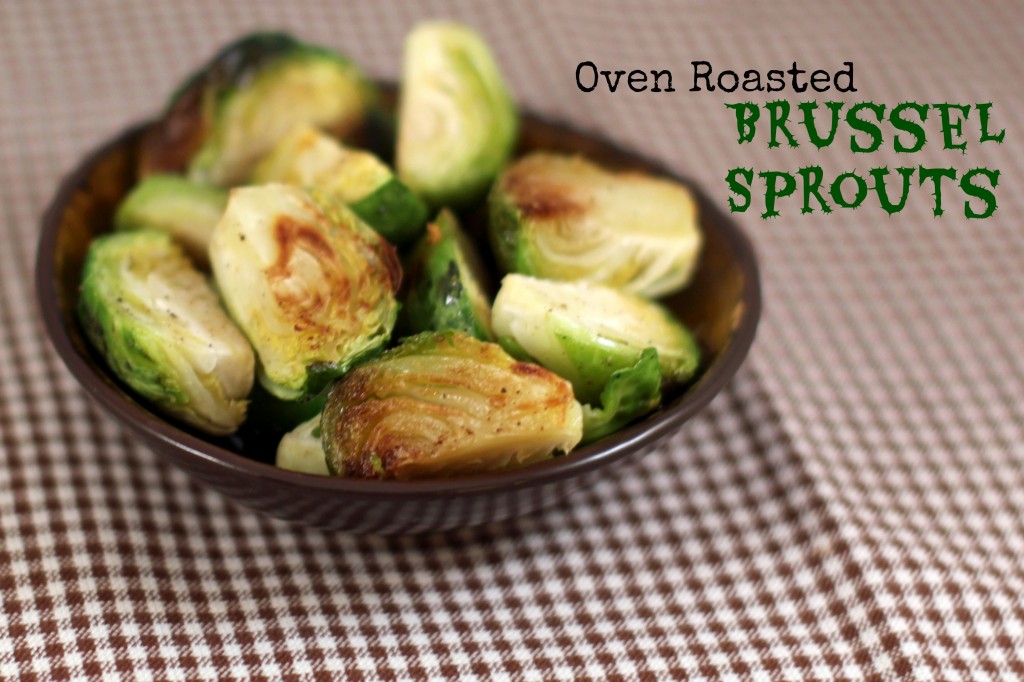
Oven Roasted Brussel Sprouts

This side dish is so easy to make I’m not even sure it warrants a recipe.  I don’t remember ever having brussel sprouts when I was little — it doesn’t seem like something my Grandpa would eat — but I discovered them last year and roasting them is actually very delicious.

I made these as a side dish for tortellini on Monday evening.  By the time Mike walked in, the trio was already sitting at the table, and loudly lamenting that they dislike brussel sprouts.  Mike, who barely touches a vegetable himself, told them they were good and tried one.  And actually ate it.  This, my friends, is legendary.  Sure, he doesn’t love them — but he ate one and commented, “They aren’t bitter like I remember them being as a kid.”  Baby steps.

Anna ate one.  Clara ate half a breadstick as her entire meal — and then ended up in the front room having a snack after her siblings were in bed because her belly hurt from not eating — and Bo — well, we won’t even talk about Bo.  Let’s just say he didn’t eat it.

Personally, I think these are delicious.  They are quick and easy to throw together for a side dish for anything from chicken to pasta.  And as the lone vegetable eater in the house, I’ll make them for myself since they require very little prep work.  If you like vegetables (unlike the rest of my family) then you’ll like these.  Promise.

Oven Roasted Brussel Sprouts
Author: 
Prep time: 
Cook time: 
Total time: 
Serves: 4
 
Ingredients
  • 10-12 brussel sprouts, cut into fourths
  • olive oil
  • black pepper
  • salt
Instructions
  1. Preheat oven to 350 and line a baking sheet with foil. Place cut brussel sprouts on the sheet and drizzle with olive oil. Season with pepper and salt to taste. Roast for 15-18 minutes.
  2. *** Also great sprinkled with a bit of Parmesan cheese ***


Cake Batter Cookies

Last Thursday, both Bo and Anna were home from school sick.  Anna was coughing and had a fever on Wednesday and Thursday, and Bo was coughing too.  Clara trotted off to school all by herself like a big girl, while the sickies attempted to entertain themselves while I worked.

By mid-day, Bo and Anna were both a bit stir-crazy, so after lunch we decided to make some Christmas goodies to surprise Clara with as an after-school snack when she arrived home.  However, since they were both sick, I didn’t really want them touching and sneezing on the ingredients, which they weren’t thrilled about – they like to be right in the middle of my baking creations.  Bo and Anna sat at the bar and I gave them each spoons of cookie dough while I pulled these cookies together.  The recipe they are based on was from Pinterest (where else?) and comes from Sally’s Baking Addiction.  I also halved this crockpot hot chocolate recipe so it would fit in my small crockpot to accompany the cookies – it was VERY sweet hot chocolate!

As soon as Clara was in the car, Bo and Anna were both excitedly telling her about the special treat we had at home — and everyone enjoyed sampling the cookies and hot chocolate.  After our snack, we wrote our letters to Santa — luckily, the trio has been pretty good this year so I think they’ll get several items off their lists.

Cake Batter Cookies
Author: 
Prep time: 
Cook time: 
Total time: 
Serves: 25
 
Ingredients
  • 1 box white cake mix
  • 1 tsp baking powder
  • 2 large eggs
  • ⅓ cup canola oil
  • 1 teaspoon vanilla extract
  • ¼ cup sprinkles (or more -- original recipe called for a full cup, but that seemed like a lot)
Instructions
  1. Preheat oven to 350. Line three cookie sheets with parchment paper.
  2. In a large bowl, mix together the cake mix, baking powder, eggs, oil, and vanilla by hand. Mix well until a soft dough forms. Fold in the sprinkles.
  3. Using a melon baller, drop balls of dough onto baking sheets. Bake for 9 minutes -- the cookies will not brown. Allow to cool on the sheet for a few minutes and transfer to a cooling rack. Makes approximately 25 cookies.


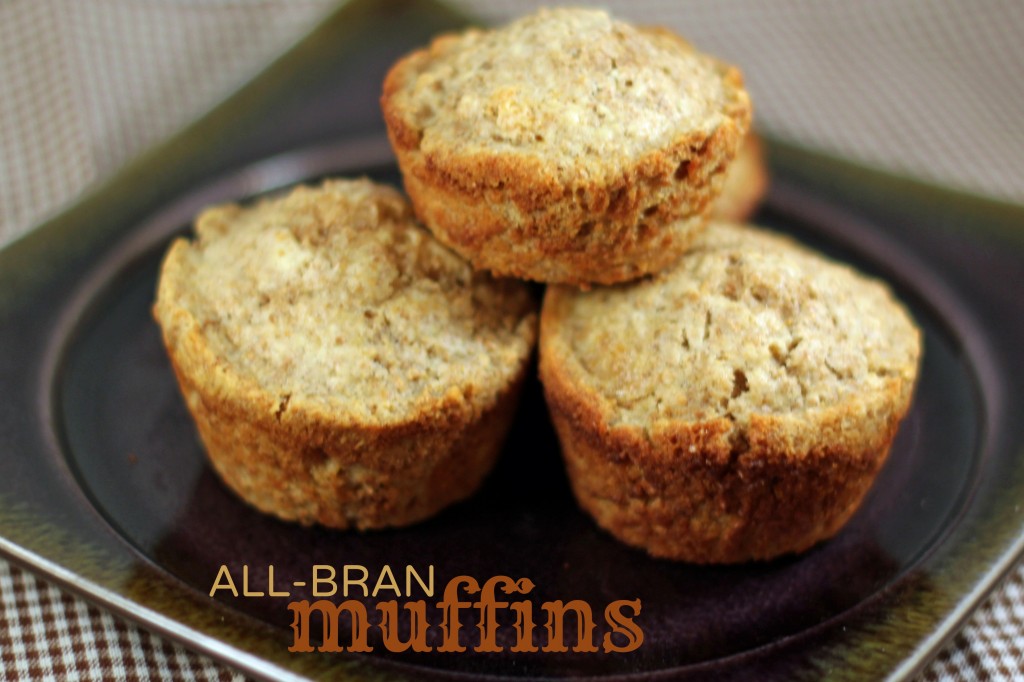
All-Bran Muffins

These aren’t the prettiest muffins ever, but considering the amount of fiber they pack, they are surprisingly tasty.  I made these on Tuesday morning.  I’ve been hitting the gym with a friend or two around 5 am on Tuesday and Thursday mornings, so by the time I showered on Tuesday, I was starving and wanted to make a warm breakfast that I thought the kids and I would both enjoy.  A quick flip through the cookbook and I settled on these — they pulled together very quickly and by the time I’d dried my hair, found the kiddos clothes for the day, and allowed them to open their Advent calendars, we were ready for breakfast.

The kids enjoyed these with butter served with milk.  I enjoyed mine with a cup of steaming hot coffee to kick-start my day in the right direction.  Next time, I think I’ll consider subbing the white flour for wheat and try subbing the sugar for honey.  Subbing the oil for applesauce also seems like a no-brainer. I’ll update this post with the results.

These muffins received 3 1/2 wooden spoons from the trio and me!

All-Bran Muffins
Author: 
Prep time: 
Cook time: 
Total time: 
Serves: 6
 
Ingredients
  • 1½ cup All Bran Cereal
  • 1¼ cup milk
  • 1 egg
  • ¼ cup vegetable oil
  • ¼ tsp salt
  • 1 Tbsp baking powder
  • ½ cup sugar
  • 1¼ cup flour
Instructions
  1. In a large bowl, mix cereal and milk. Add egg, oil, salt, and sugar and mix well. Add the baking powder and the flour, stirring only until combined. Using an ice cream scoop, fill 12 muffin tins sprayed with baking PAM. Bake at 400 for 20 minutes.


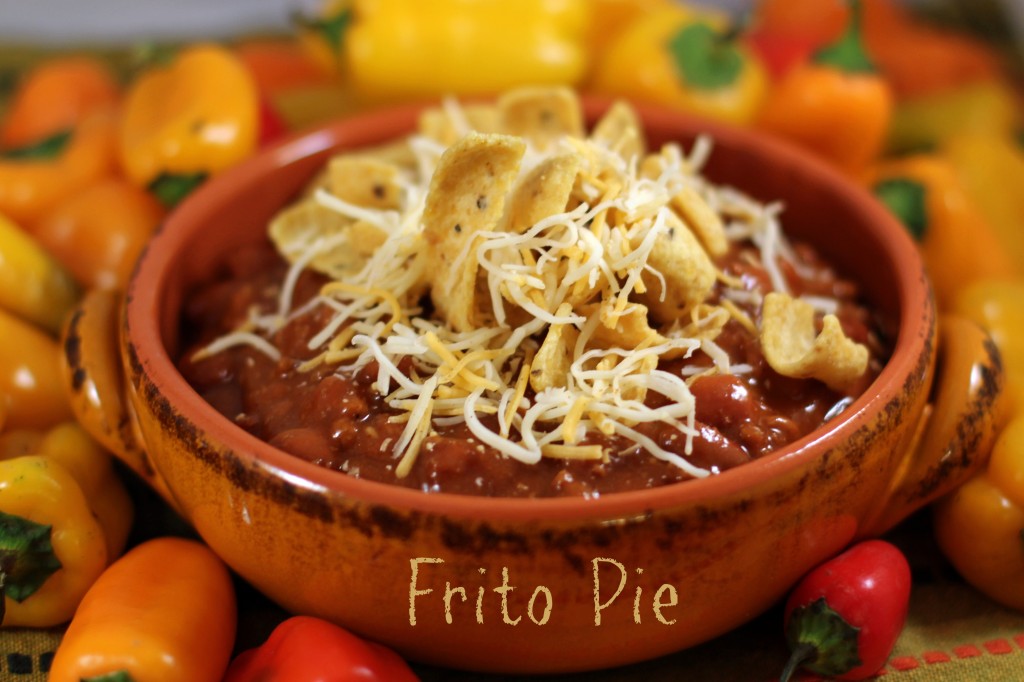
Frito Pie

Considering we are in the midst of a nearly 70 degree day here in the Midwest (Happy December!) eating a warm bowl of chili doesn’t sound as appealing as it did a few weeks ago when I made Frito Pie for Mike and his buddy, Derek, to enjoy while they watched the Bears game.  However, I’m not sure they took full advantage of the Frito Pie possibilities and probably just ate the chili plain…

Everyone can make chili and there are hundreds of different recipes for it. This chili recipe is my mom’s and Mike commented, “It was good, but not as good as your mom’s.”  So even though I used her recipe, I must not have done it quite right.  Maybe she’ll comment here with some insight…

What makes this recipe extra special is the extra ingredients that are added to the chili before serving to give it extra saltiness and creaminess.  Yum!  While you can definitely eat the chili plain, I highly suggest taking it up a notch to the Frito Pie level.  To upgrade, you’ll layer Fritos, chili, cheddar cheese, sour cream, and finely chopped white onion in your bowl.  It’s ridiculously easy but oh, so tasty!

Frito Pie
Author: 
Prep time: 
Cook time: 
Total time: 
Serves: 8
 
Ingredients
  • 24 oz. can tomato juice
  • 3 15 oz. cans chili beans
  • 1 pkg. chili seasoning of your choice
  • 1 lb. hamburger, browned
  • 1 onion, chopped -- ½ added to the hamburger and browned, other half reserved
  • 1 Tbsp. sugar
  • Fritos
  • shredded cheddar cheese or Mexican blend cheese
  • sour cream
Instructions
  1. Brown hamburger and ½ of the onion, drain fat. Add hamburger and onion mixture, tomato juice, chili beans, chili seasoning, and sugar to a large, heavy bottomed pot and bring to a boil for 10 minutes. Read heat and simmer for several hours.
  2. To serve, layer Fritos, chili, cheese, sour cream, and remaining chopped onion in a bowl. Perfect for enjoying during Sunday football in the fall.


Pumpkin Roll

Last Wednesday, Mike and I spent the afternoon baking for Thanksgiving.  Mike made chocolate pecan bars and I made pumpkin pies, pumpkin roll, and pecan pie.  I first made this pumpkin roll in September of 2001 using a recipe from AllRecipes.com.  That feels like the dark ages — I was in college, it was pre-Mike, and very pre-Pinterest.

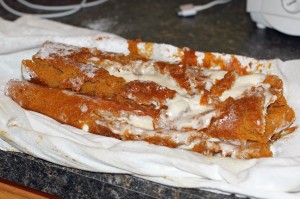
Luckily, AllRecipes.com saves all of my past recipes so I was easily able to find the recipe and thought it would be relatively painless to pull together as I’ve made it several times and never had any issue.  However, since I’m all about keeping it real, here’s a picture of what my first attempt at this pumpkin roll came out looking like last week.

Yeah, there was no way I was serving that at our Thanksgiving dinner.  Mike ran to the store to obtain the ingredients I needed to try again (cream cheese) and the photo above is of the finished product that turned out much more appealing.  I think the issue with the first roll is that the cake was not fully cooked.  I baked it the 15 minutes noted on the original recipe but for the second I baked for 18 minutes.  I also let the successful cake cool longer than the original recipe states – I let it cool almost an hour instead of the 20 minutes recommended.

This pumpkin roll is always a hit and went over well at our Thanksgiving gathering.  It’s the filling that makes it so delicious.  Anna thought so anyway…


Pumpkin Roll
Author: 
Prep time: 
Cook time: 
Total time: 
Serves: 12
 
Ingredients
  • ¾ cup flour
  • 1 cup sugar
  • 1 tsp. baking soda
  • 2 tsp. pumpkin pie spice
  • 1 cup pumpkin puree
  • 3 eggs
  • 1 tsp. lemon juice
  • 1 - 8 oz cream cheese, softened
  • ¼ cup butter
  • 1 tsp vanilla
  • 1 cup powdered sugar
Instructions
  1. Preheat oven to 375. Line a 9x13 inch jelly roll pan or cookie sheet with parchment and spray with Baking PAM.
  2. In a large bowl, mix together the pumpkin puree, eggs, and lemon juice. Add the sugar, baking soda, pumpkin pie spice, and flour, stirring well to combine. Spread the mixture evenly on the to the prepared pan and bake for 15 to 18 minutes.
  3. Lay a damp linen towel on the counter and sprinkle it with confectioner's sugar. Turn the cake onto the towel and roll the towel up with the cake in it. Place the rolled cake-in-towel on a cooling rack and cool for at least 40 minutes.
  4. To prepare the filling, blend the cream cheese (soften in the microwave for 10 seconds if needed), butter, and vanilla. Once combined, add the powdered sugar and blend well.
  5. When the cake has cooled, unroll it and spread the filling. Immediately re-roll and wrap in plastic wrap. Refrigerate and cut into slices to serve.


Homemade Pizza Spaghetti-Os


When Bo was a baby I swore that highly processed foods like Spaghetti-Os would never cross his lips.  Then, I became pregnant with twins and since Mike is a closet Spaghetti-Os and canned pasta eater, they ended up in our cabinet. Canned Spaghetti-Os is still one of those foods that I just can’t force myself to feed them — so I save them for Daddy dinners or for the babysitter on date nights.  Of course, my kids love them.

When I ran across a pin on Pinterest for homemade Spaghetti-Os, I knew I had to make them for my kiddos.  Of course, I couldn’t just leave the recipe alone and had to change it up a bit — and Pizza Spaghetti-Os were born.

Of course, Bo was smart enough to realize that these were not the same as their canned counterpart and at first refused to eat them.  However, once he took a bite, he thought they were yummy — even if they didn’t taste quite like “real” Spaghetti-Os.   The girls gobbled them up – no problem.

The secret ingredient in these is the pepperoni flavored pizza sauce by Contadina.  We can’t find it by us (there is three cheese and regular, but not the pepperoni) so we buy it in bulk when we visit Mike’s parents. I served pepperoni on the side as I thought it might be a texture issue for my kids.  However, I think finely chopped pepperoni directly in the pasta would be a delicious addition.

Homemade Pizza Spaghetti-Os
Author: 
Prep time: 
Cook time: 
Total time: 
Serves: 6
 
Ingredients
  • 8 oz pasta rings
  • 2 tsp. minced garlic
  • Pinch of crushed red pepper flakes
  • 15 oz can Contadina brand Pepperoni flavored pizza sauce
  • 1 cup water
  • 1 Tbsp. tomato paste
  • ½ tsp. salt
  • ¼ tsp. pepper
  • ½ tsp. granulated sugar
  • 4 Tablespoons unsalted butter, cut into pieces
  • ¼ cup skim milk
  • 1 cup shredded pizza-blend cheese
Instructions
  1. Cook the pasta according to the package directions. In a large saucepan, heat 2 Tbsp. of the butter over medium heat. Add the garlic and red pepper, then stir in the pizza sauce, water, tomato pasta, salt, pepper, sugar, and remaining butter. When the butter is completely melted and the sauce warm, stir in the milk. Simmer until the pasta is done.
  2. Remove from heat and stir in the pizza cheese until melted. Drain the pasta and combine with approximately ¾ths of the sauce (any more and it will be soupy). Stir to combine. Add finely chopped pepperoni or serve with pepperoni on the side.

I made this for dinner on a week night last week and it was very quick and easy.  Not quite as easy as opening a can, but still not a lot of effort.  After my trio ate there were enough leftovers for another full meal.


Chicken Tortilla Soup {Crockpot}


Yesterday, we we went for a family walk after our Thanksgiving dinner and it was beautiful outside.  The temperature was nearly 60 and just gorgeous.  Today, winter has set in with temperatures in the low 30’s and wind chills in the teens here in the Midwest.  I can’t say I’m thrilled (I told Mike today I wanted to live in Florida) but at least I can have warm soup for dinner while curled up by the fire (if I can convince Mike to light one…) 🙂

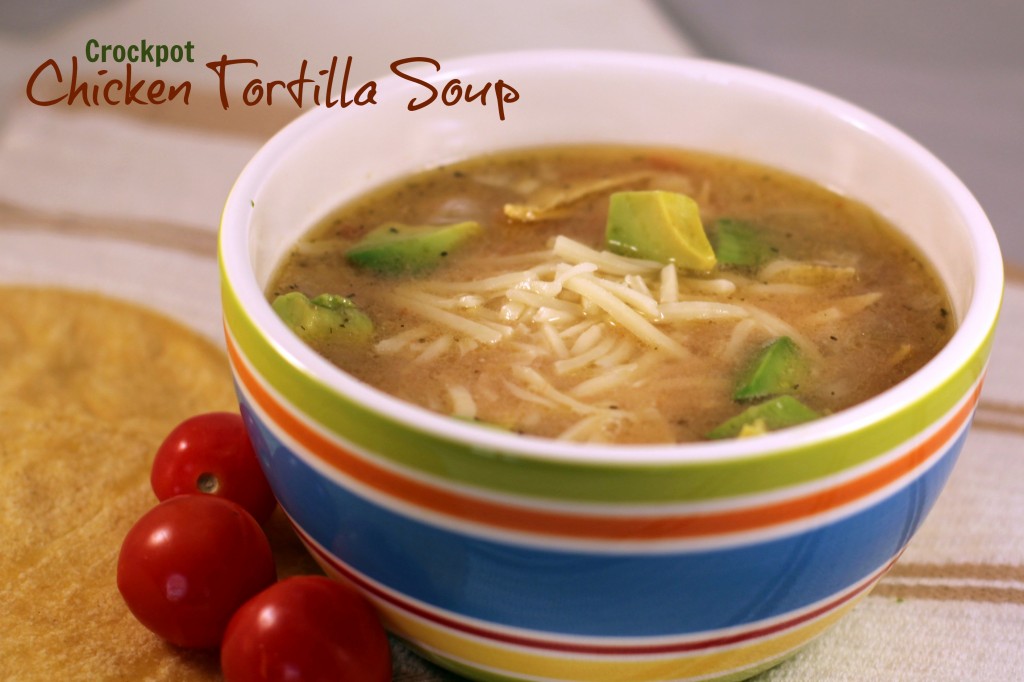
Continuing with our Mexican kick, I threw together (literally) chicken tortilla soup.  I’ve made several versions, but this quick and easy crockpot recipe wins out often because it is so painless.  It makes a lot, freezes well, and is good for leftover lunches.  I’m not sure where the base recipe originated from but it’s probably somewhere in cyberspace.

I threw this soup together while the trio was eating breakfast and it was ready to go by lunchtime with thawed chicken breasts.  I’ve also made it using frozen chicken breasts, which I’d recommend if you plan to make it in the morning and serve for dinner.  This soup pairs well with BLT Guacamole and chips.

If you have some leftover turkey that you’d like to throw in instead of chicken, I think it would be just as good.  I’d reduce the cook time to 2 to 3 hours since the turkey is already cooked.  I don’t see anything wrong with adding a bit of Mexican flair to your Thanksgiving leftovers!

Chicken Tortilla Soup {Crockpot}
Author: 
Prep time: 
Cook time: 
Total time: 
Serves: 10
 
Ingredients
  • 4 boneless chicken breasts (can be frozen)
  • 1 - 4 oz can green chilies, drained
  • 2 tsp. minced garlic
  • 1 yellow onion, diced
  • 2 - 15 ounce cans of Rotel tomatoes with green chilies
  • 1 cup chicken broth
  • 1 tsp cumin
  • salt and pepper
  • 4 corn tortillas, sliced into ¼ inch stripes
  • 2 Tbsp. cilantro
  • ½ cup shredded Monterey jack cheese
  • lime juice
  • avocado (optional)
Instructions
  1. Place chicken in crockpot and toss in the chilies, garlic, onion, Rotel, broth, cumin, and salt and pepper on top. Stir occasionally while cooking to shred chicken as it cooks. For frozen chicken cook on high for 8-9 hours. For thawed chicken, cook on low for 4-5 hours. Just before serving, add tortillas and cilantro. Serve by topping each bowl with shredded cheese, diced avocado, and a squeeze of lime.