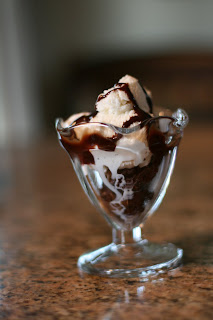
Tuesdays with Dorie: Chocolate Chunkers

This week’s recipe was chosen by Claudia at Fool for Food. It can also be found on pg. 70 of Baking: From My Home to Yours by Dorie Greenspan.

Mike, Bo, and I traveled up north this weekend because both Mike and I had dentist appointments. Bo had fun staying with his Grandma and Grandpa while Mike and I had our teeth cleaned!

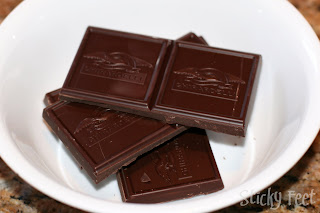
When I saw this recipe, I knew I would have to wait until after we came back to make these, because the recipe called for “premium” chocolate. When I think of premium chocolate there is only one place I think of — Graham’s. Yumm-o! Besides, there’s nothing more exciting than combine a dentist visit with chocolate! Dentists love it when we eat tons of sweets!

While I worked and Bo napped, Mike made the Graham’s run for all of the chocolate that is needed for these heavy duty cookies.

On Sunday night, Mike and I tackled making the cookies after Bo was in bed. First, I measured out the dry ingredients and melted the chocolate with butter for the dough part of the chunker.

I blended the eggs, sugar, and vanilla. Then I added the melted chocolate mixture, and finally, I added the dry ingredients. All in my lovely, KitchenAid. God’s gift — I’m tellin‘ ya.
Mike was a sweetheart and chopped the chocolate and peanuts for me. Since these are chunkers, I needed chunks. Oh, the irony.
Finally, I was able to combine all of the crunchies and the dough to make a very rich looking cookie dough. I scooped heaping tablespoons onto the cookie sheets and shoved these bad boys into the oven.
I ended up with some really chocolatey chunkers!! These are RICH!! Definitely a cookie you’ll want a big glass of milk with!! I couldn’t eat more than one. Mike had two and said, “These aren’t a cookie, they’re a meal.” I asked if I could quote him. Of course, he said yes.

Tuesdays with Dorie: Chocolate Whopper Malted Drops

This week’s recipe was selected by Rachel at Confessions of a Tangerine Tart. For a copy of the full recipe, click over to Rachel’s blog or buy the book, Baking: From My Home to Yours by Dorie Greenspan.

Here’s the dough. Isn’t it beautiful in my Kitchen Aid. (Have I mentioned how much you need a mixer like this? Wow. It’s like heaven for any baker.)

After the dough was ready I scooped it out on to the parchment. I was happy that there was no refridgeration needed for these. Last week’s cookies took patience — which is not a virtue I have!!
Here are the cookies on the cooling rack.
Yum!
As always, these cookies are Bo approved!

Mike wasn’t a big fan of these cookies. He thought they were too cake-like. My mom ate one bite and didn’t want any more… Not her type of cookie either. To avoid the nickname, Thunderina (for my huge thighs after eating an entire batch of cookies myself), I took them to school where they were a hit with teachers and yearbook girls.

Or at least I think they were — I brought home an empty container…

Tuesdays With Dorie: Chunky Peanut Butter and Oatmeal Chocolate Chipsters

This week’s recipe was chosen by Stefany of Proceed with Caution. To see the full recipe, click over to her blog or buy the book, Baking: From My Home to Yours by Dorie Greenspan. I did all of the first stages — measuring the dry ingredients, adding the wet ingredients, you get the idea. None of it was very pretty. Then I put it all in the Kitchen Aid. (Have I mentioned how much you need a Kitchen Aid mixer? I love it!) It wasn’t very pretty either. 🙂
After chilling the dough for two hours (two hours is a long time when you want cookies!!) I rolled the dough into balls and flattened with my palm. That Dorie, she’s just so descriptive!
Finally, 4 hours after I started, I had cookies. And they were worth it. Definitely a new family favorite! They remind me a lot of monster cookies — only without the M & M’s.
They were pretty. And oh so good!
Bo did not try these cookies — he can’t have peanut butter yet. But he wants to encourage all of you to click over to Tuesday’s with Dorie and see all of the other pretty cookies!

Tuesdays with Jamie??? French Silk Pie

If you’re stopping by to see Granola Grabbers, well… I hate to disappoint, but I didn’t make them this week. 🙁 Mike doesn’t eat a lot of the ingredients in the grabbers and I’ve just had too much on my plate this week to get it done. Please stop over to Tuesdays with Dorie and see the recipes. I’d eat them if someone would make some for me. 🙂

Instead, I present you with a recipe for French Silk Pie. My 7th grade science teacher and now financial planner (funny how that worked out…) brought this pie to my parent’s house when they moved a little over two years ago. Mike inhaled half of the pie in one sitting so I had to ask for the recipe. It’s definitely become a family favorite.

And I will warn you now — if you are on any type of a diet, just click away right now. You don’t want to see this…. 🙂

First, you bake a pie crust. If you have all kinds of time on your hands I highly recommend Dorie’s pie crust. If you’re crunched for time and just trying to make something yummy for your family, you can take the easy way out (like I did this week) and use a Pillsbury ready to bake crust. I know, I know… What kind of a baker am I?

Once your crust is prepared you can start on the filling. The filling is the star of the show.
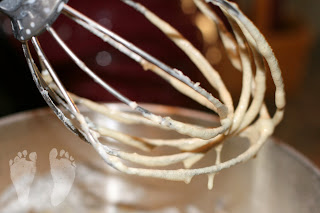
Throw 2 sticks of butter and 1 1/2 cups sugar into a stand mixer. (Have I mentioned how much I love my Kitchen-Aide. Definitely a wonderful wedding gift!) Let it beat until it is creamy and not grainy. You’ll probably have to scrape the butter off the beaters a few times. Once that is done add 2 ounces of unsweetened chocolate, melted, and 2 teaspoons of vanilla. Your filling should then look like the picture above.
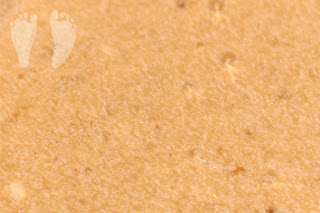
The magic of this recipe is eggs. Four of them! Add two of the eggs and blend for 5 minutes. At the end of the 5 minutes your filling should look like this.
Mike grabbed the camera and took this picture of me washing my hands. Make sure you wash your hands. It makes the pie taste better. And it’s a good thing to do to kill time while you wait for those eggs to beat.
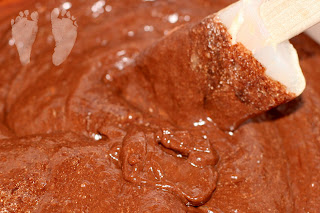
Add the other 2 eggs and beat for an additional 5 minutes. When you’re done you should have a rich, creamy, chocolate silk filling. Pour the filling into the pie crust and refrigerate for several hours or overnight. Before serving top with whipped cream (or, if you’re in a hurry — Cool Whip) and grated chocolate.
Eat. Enjoy.

As always, this recipe comes with Bo’s seal of approval. 🙂

French Silk Pie

1 cup butter
1 1/2 cup sugar
2 ounces unsweetened chocolate, melted and cooled
2 tsp vanilla
4 eggs
Bake a pie crust or use a Pillsbury refrigerated crust and make according to package directions.
Whipped cream or Cool Whip

Beat sugar and butter until sugar is not grainy. Add chocolate and vanilla. Add eggs, two at a time, beating 5 minutes after each addition. Pour into cooled pie crust. Chill 2 hours or until firm. Before serving, top with whipped cream and a little grated chocolate.

Tuesdays With Dorie: Blueberry Sour Cream Ice Cream

This week’s Tuesdays with Dorie recipe was Blueberry Sour Cream Ice Cream selected by Chronicles in Culinary Curiosity. For the full recipe, click over to her blog or buy the book, Baking From My Home To Yours by Dorie Greenspan. This recipe is on page 434.

First, I cooked the blueberries and a few other ingredients on the stove and then poured it all into the blender. Didn’t the berries look beautiful in the blender??
I added heavy whipping cream and sour cream and blended. It looked like a big, creamy smoothie. Then I stuck it in the fridge for a few hours so it could chill.
After the base chilled for about 4 hours I poured the contents of the blender into our ice cream maker. The ice cream maker was a wedding gift from Mr. and Mrs. Hunn. We don’t use it often enough! This was the perfect excuse. My ice cream was much more solid on the sides than it was in the middle as you can plainly see in the picture. But it still tasted good…

It even received a special award – Bo’s seal of approval.

Tuesdays With Dorie: Black and White Banana Loaf

This weeks Tuesdays With Dorie recipe, Black and White Banana Loaf (pg. 232) was selected by A Year in the Kitchen. For the full recipe click over to Ashlee’s site or buy the phenomenal cookbook, Baking From My Home To Yoursby Dorie Greenspan.

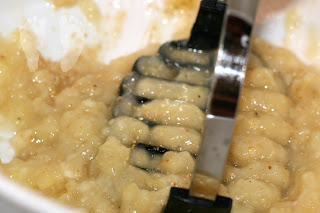
The first step was to measure out the dry ingredients and mash the bananas. Yum… mashed bananas. Looks like Bo food!

As I was adding ingredients I had to make several substitutions. I made this in the evening after Bo was in bed and I wasn’t willing to go to the store! Instead of ginger I used pumpkin pie spice and instead of whole milk I used 1/4 cup heavy whipping cream and 1/2 cup skim milk. That equals a 1/2 cup of whole milk, right? 🙂

Next, I creamed the butter, added eggs, vanilla, white and brown sugar, and the other dry ingredients to make a nice batter.

Here is the batter after I folded in the mashed banana.

I separated a little under half of the batter and added chocolate and butter. I had to make another substitution here as I didn’t have any bittersweet chocolate. I used unsweetened instead an added another 1/4 cup of brown sugar to the batter to try to make up for the sweetness — I don’t think that worked to well….

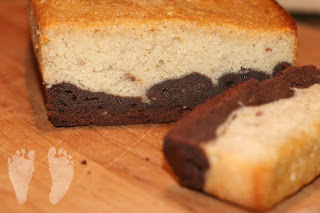
Instead of marbling I poured the chocolate in the bottom of the muffin pan and added the regular batter on top.

It was a beautiful loaf — a little flatter than I would have liked but pretty. I wasn’t a fan of the chocolate flavor mixed with the banana. Maybe if I’d had the right chocolate on hand! I’m anxious to see what everyone else thought! Pop over and see the rest of the loaves at Tuesdays With Dorie!

Tuesdays With Dorie: Chocolate Pudding Tarts

This week’s Tuesdays With Dorie recipe was selected by It’s Melissa’s Kitchen. You can find the full recipe by clicking over to Melissa’s blog or in the fabulous cookbook Baking: From My Home To Yours by Dorie Greenspan on pg. 383.

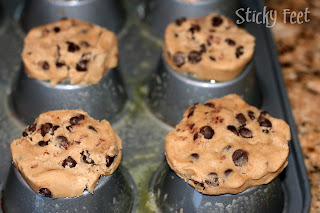
The recipe is for a rich, creamy, velvety chocolate pudding that is prepared in a food processor. I wanted a fun twist so I decided to make tarts and used cookie dough as my tart base.

I took a muffin tin, flipped it over and sprayed it generously with cooking spray. I then put rounds of dough on top of each muffin tin.

I baked the tarts for about 11 minutes in a 350 degree oven. While they were baking I tackled Dorie’s chocolate pudding. It was a simple recipe to follow.

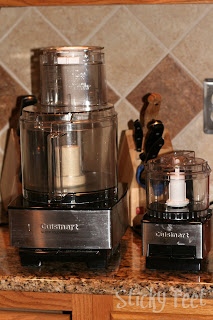
I used both my big and my little Cuisinart while making this recipe. The baby Cuisinart blending the dry ingredients while the mama Cuisinart blended the wet ingredients. Don’t they look cute side by side?

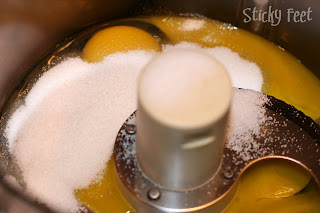
Here are the eggs and a little bit of sugar preparing to go for a whirl.

I only used 4 oz of bittersweet chocolate instead of the 5 oz the recipe calls for. I didn’t realize the bar I purchased was only 4 oz until I was home and in the process of making the recipe. Bo was taking a nap so there was no chance of a quick run to the store. I figured it would be just as good with only 4 oz and I found it to still be quite rich and chocolaty.
I was amazed at the frothiness of the pudding. I think this may be part of the secret that makes it so yummy.

It was a fast recipe to prepare and before I knew it my tarts were out and the pudding was ready. I spooned the pudding into my cookie tarts and behold — Chocolate Pudding Tarts!

They were delicious and even received a rave review from Mike, who isn’t a fan of pudding!

Tuesdays with Dorie: Apple Cheddar Scones

**Please vote in the poll on the left sidebar!!**

This week’s Tuesdays with Dorie recipe was Apple Cheddar Scones from pg. 32 of Baking: From My Home To Yours by Dorie Greenspan. This weeks recipe was selected by Karina at The Floured Apron. (You can find the full recipe by clicking the link or by purchasing the cookbook which is currently on sale at Amazon.)

I have to admit, I wasn’t thrilled that this was the recipe selected. It seems like a fall recipe to me — with cold apple cider being one of the key ingredients.

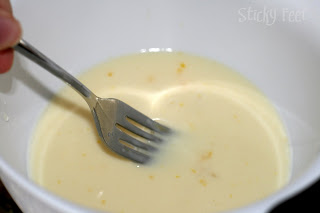
On Thursday evening, I made these as part of our dinner. The first step was to mix the liquid ingredients together. I couldn’t find apple cider anywhere so I substituted with apple juice. I also had to buy a ginormous carton of buttermilk for these so if you have any good recipes that take buttermilk I’d love to hear about them.

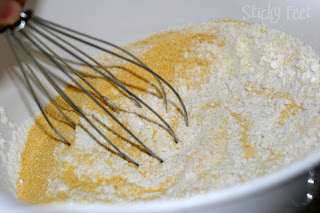
After I mixed the wet ingredients in one bowl I mixed the dry ingredients in a separate bowl. One of these ingredients was cornmeal, which really made the scones in my opinion. The cornmeal gave the finished scone a lot of texture and flavor.
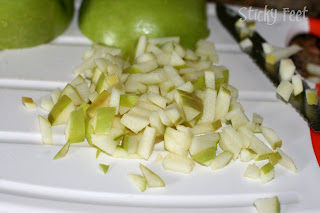
Probably because I live in the middle of bo-funk nowhere, I couldn’t find dried apples. Except for the little Gerber ones for babies. So instead I used fresh apple. Honestly, I think it was probably better with the fresh apple than it would have been with dried.
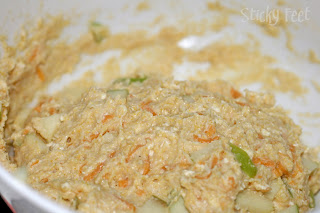
I combined the wet and dry ingredients and used my whisk as a pastry blender to make the dough. Then I folded in the apple and grated cheddar cheese.
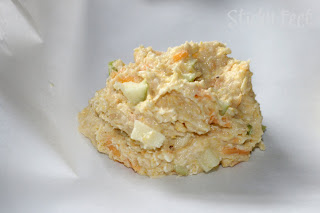
I scooped the dough into individual mounds and put them on the parchment paper to bake.

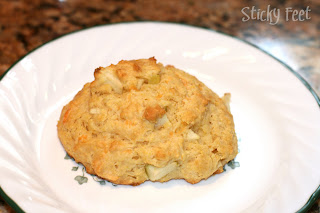
And the end result was a very rustic, fall-looking and tasting, apple cheddar scone.

I really liked the scones. Mike wasn’t a big fan. He says he’s never liked scones. I think if I make them again (in the fall) and call them biscuits, he’ll lap it up. But this was not a part of our meal, it was just something I gave him to try after dinner. 🙁 My mom liked them though and so did I. They have a wonderful texture from the apple and cornmeal and were great cold the next morning for breakfast.

Tuesdays With Dorie: Blueberry Cobbler

This week’s Tuesday’s with Dorie recipe was Mixed Berry Cobbler from pages 416-417 of Baking: From My Home to Yours by Dorie Greenspan. This week’s recipe was chosen by Beth of Our Sweet Life.

I decided to tweak the recipe this week. Instead of mixed berry, I decided to make plain blueberry. I also made individual mini-cobblers instead of one big cobbler. It worked out well!!

The reason I wanted to make plain blueberry instead of mixed berry is that several years ago, Mike and I went out to dinner Mill Race Inn and he had his first cobbler. Mike has texture issues with food so he wasn’t sure if it was something he would like — but he loved it!! He says that he’s never found a cobbler as good as that one so I thought I would try to replicate it. While this cobbler was good it didn’t receive the rave reviews like the first
one…

I started off by putting all of the dry ingredients for the dough into a large mixing bowl. Then I chopped up the butter.

Just like Dorie said, I used my fingers to mix the butter into the dry ingredients. It was actually kinda fun.
Bo thought it was pretty fun too. Mike and I were both in the kitchen cooking. Mike was baking cookies and took some of the pictures for this post (special thanks to my guest photographer!). Bo sat in his highchair and was entertained by our antics. At least he finds us amusing…
After a cute Bo break, I added the cream to form the dough and mixed it with a fork.
I then rolled out the dough. I used a biscuit cutter to cut circles for the top of all eight of my mini-cobblers.
Then I mixed up the fruit mixture. These are my berries coated with sugar, lemon zest, and cornstarch.

I spooned the berries into ramekins. There were just enough to make the 8 servings.
Then I topped each with a circle of the cobbler dough.
I cut crosses in the top of each but they didn’t really need them. The sides gave them plenty of room to breathe and vent.
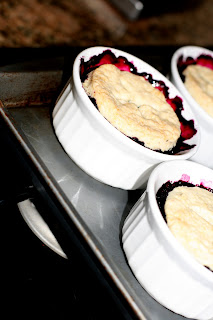
Then I popped the tray in the oven.
I baked them for only 50 minutes instead of the longer time for the full cobbler. When they came out they were warm and bubbly.

We had them for supper on Sunday evening. We fixed a nice dinner and invited my mom over to eat. We ate out on the porch — one of my favorite parts of nice weather!
When we were ready for dessert I had to go in to get the ice cream. I enjoy my cobbler warm with vanilla ice cream on top.
Here I am, scooping up my first bite!
And here goes that bite into my waiting mouth.
And then my ramekin was empty.
I think I liked it!

French Chocolate Brownies

Because apparently, I don’t think I have enough to do, I decided to join a baking club. (Yes, I’m 26. Yes, I joined an online baking club… Just call me a nerd, it would be easier.)

I joined Tuesdays with Dorie after drooling over the recipes on several of my favorite foodie websites. Last week, my copy of the book arrived and this week was my first chance to make one of Dorie’s special recipes.
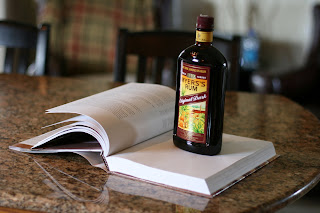
The first step in making these brownies was to send Mike out for a bottle of dark rum. This is the smallest and cheapest bottle he could find to supply the 1 1/2 tablespoons needed for the recipe. At least it makes a good page holder. 🙂
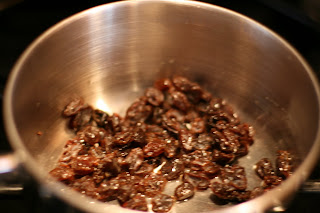
I put the raisins in the pan, added the water, and let them cook.

Meanwhile, I took a shortcut and melted the chocolate and butter in the microwave instead of on the stove. It worked just as well.
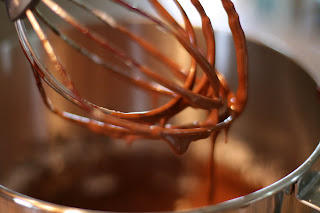
I beat the egg and sugar together and then added the chocolate mixture. Yummm….
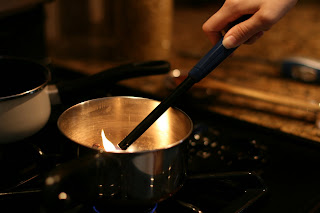
Finally, it was time to add the rum. I added the rum to the raisins and prepared for a big burst of flame.
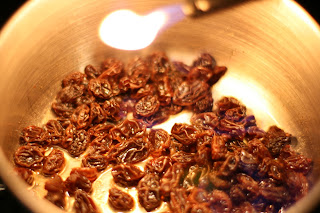
Unfortunately, all I saw were a few little blue patches in my raisins. After I folded in the dry ingredients, I added the raisins. If I make these brownies again, I’ll be leaving the raisins out. There is a weird texture issue with raisins in brownies…
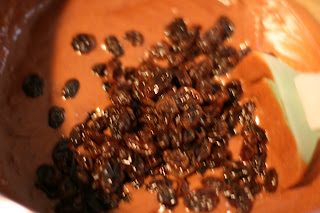
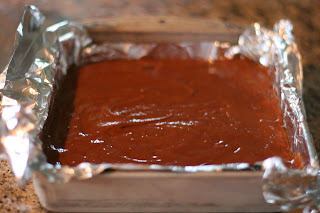
Here are the brownies, ready to go in the oven.
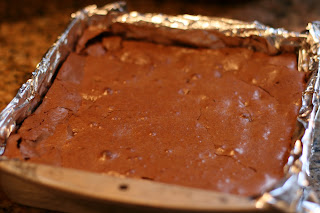
Here they are, fresh out of the oven.
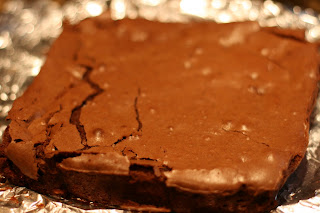
And here is the large brownie, ready to be cut and made into yummy brownie sundaes!

Overall, it was a successful first attempt — they aren’t the prettiest food I’ve ever made — or the best (raisins in brownies is just odd to me) but it was a fun experiment. I’m hoping that Tuesdays with Dorie will force me outside of my comfort level a bit and I’ll learn a few tricks along the way.

Interested in trying these brownies yourself? The full recipe is below!

French Chocolate Brownies


– makes 16 brownies -Adapted from Baking From My Home to Yours.


Ingredients

1/2 cup all-purpose flour

1/8 teaspoon salt

1/8 teaspoon cinnamon (optional)

1/3 cup raisins, dark or golden

1 1/2 tablespoons water

1 1/2 tablespoons dark rum

6 ounces bittersweet chocolate, finely chopped

1 1/2 sticks (12 tablespoons; 6 ounces) unsalted butter, at room temperature and cut into 12 pieces

3 large eggs, at room temperature

1 cup sugar

Getting ready: Center a rack in the oven and preheat the oven to 300°F.

Line an 8-inch square baking pan with foil, butter the foil, place the pan on a baking sheet, and set aside.

Whisk together the flour, salt and cinnamon, if you’re using it.

Put the raisins in a small saucepan with the water, bring to a boil over medium heat and cook until the water almost evaporates. Add the rum, let it warm for about 30 seconds, turn off the heat, stand back and ignite the rum. Allow the flames to die down, and set the raisins aside until needed.

Put the chocolate in a heatproof bowl and set the bowl over a saucepan of simmering water. Slowly and gently melt the chocolate, stirring occasionally. Remove the bowl from the saucepan and add the butter, stirring so that it melts. It’s important that the chocolate and butter not get very hot. However, if the butter is not melting, you can put the bowl back over the still-hot water for a minute. If you’ve got a couple of little bits of unmelted butter, leave them—it’s better to have a few bits than to overheat the whole. Set the chocolate aside for the moment.

Working with a stand mixer with the whisk attachment, or with a hand mixer in a large bowl, beat the eggs and sugar until they are thick and pale, about 2 minutes. Lower the mixer speed and pour in the chocolate-butter, mixing only until it is incorporated—you’ll have a thick, creamy batter. Add the dry ingredients and mix at low speed for about 30 seconds—the dry ingredients won’t be completely incorporated and that’s fine. Finish folding in the dry ingredients by hand with a rubber spatula, then fold in the raisins along with any liquid remaining in the pan.

Scrape the batter into the pan and bake 50 to 60 minutes, or until the top is dry and crackled and a knife inserted into the center of the cake comes out clean. Transfer the pan to a rack and allow the brownies to cool to warm or room temperature.

Carefully lift the brownies out of the pan, using the foil edges as handles, and transfer to a cutting board. With a long-bladed knife, cut the brownies into 16 squares, each roughly 2 inches on a side, taking care not to cut through the foil.

Serving: The brownies are good just warm or at room temperature; they’re even fine cold. I like these with a little something on top or alongside—good go-alongs are whipped crème fraiche or whipped cream, ice cream or chocolate sauce or even all three!

Storing: Wrapped well, these can be kept at room temperature for up to 3 days or frozen for up to 2 months.