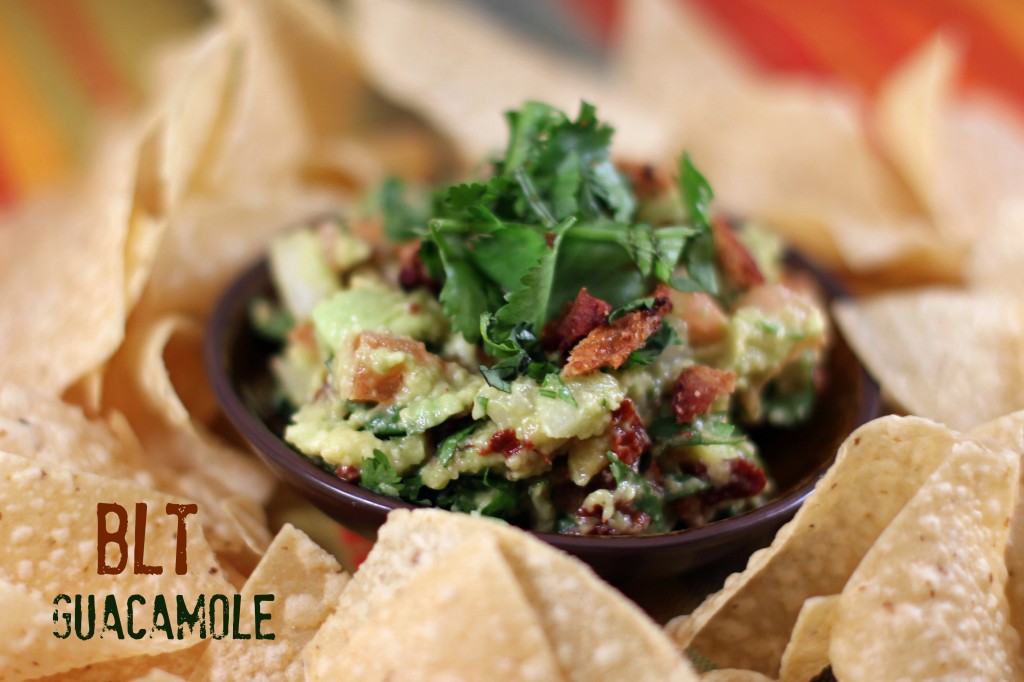
BLT Guacamole

Within the last year, Mike has discovered the beauty of guacamole.  Before, he wouldn’t touch the stuff, now he can’t seem to get enough.  During his Monday cooking spree last week, he attempted a version of Rick Bayless’ guacamole from the “Fiesta at Rick’s” cookbook.

Mike and I are huge Top Chef fans (we’ll be cruising with Top Chef stars in April!) and discovered Rick Bayless when he was on Top Chef Masters.  When we went to Chicago a few weeks before my 30th birthday we ate at Frontera Grill and I received Rick’s cookbook from Mike for my birthday.  It’s one of those books we’ve looked at longingly for awhile but now we’re finally venturing to try some of the recipes.  Especially since we both seem to want to eat Mexican food every day!

This guacamole is delicious.  It’s spicy with a bit of kick without being overpowering and the bacon adds a smokey goodness that elevates guacamole to a whole new level.  This recipe is a keeper — and one we’ll be making again and again!

We did have to venture to the Mexican market for the chipotle chiles en adobo, which are essential for this recipe.  For those of you that are even more rural than we are, I did find them on Amazon.  One can would make several batches of guac.

BLT Guacamole
Author: 
Prep time: 
Total time: 
Serves: 6
 
Ingredients
  • 5 strips thick cut bacon, cooked until crisp and crumbled
  • 3 large, ripe avocados
  • ½ medium white onion, finely chopped
  • 2 or 3 canned chipotle chiles en adobo, removed from canning sauce, stemmed, slit open, seeds removed and finely chopped
  • 1 large tomatoes cored and finely chopped
  • ½ cup chopped fresh cilantro
  • salt
  • 1 to 2 Tbsp. fresh lime juice
Instructions
  1. Scoop the flesh from the avocados into a large bowl. Using a potato masher or large fork, mash the avocados. Add the onion, chiles, tomatoes, cilantro, and about ⅔ of the bacon. Gently stir to combine. Taste and season with salt and lime juice.
  2. Use plastic wrap to cover the surface of the guacamole until ready to serve. Sprinkle with remaining bacon and a bit of cilantro and enjoy!

 

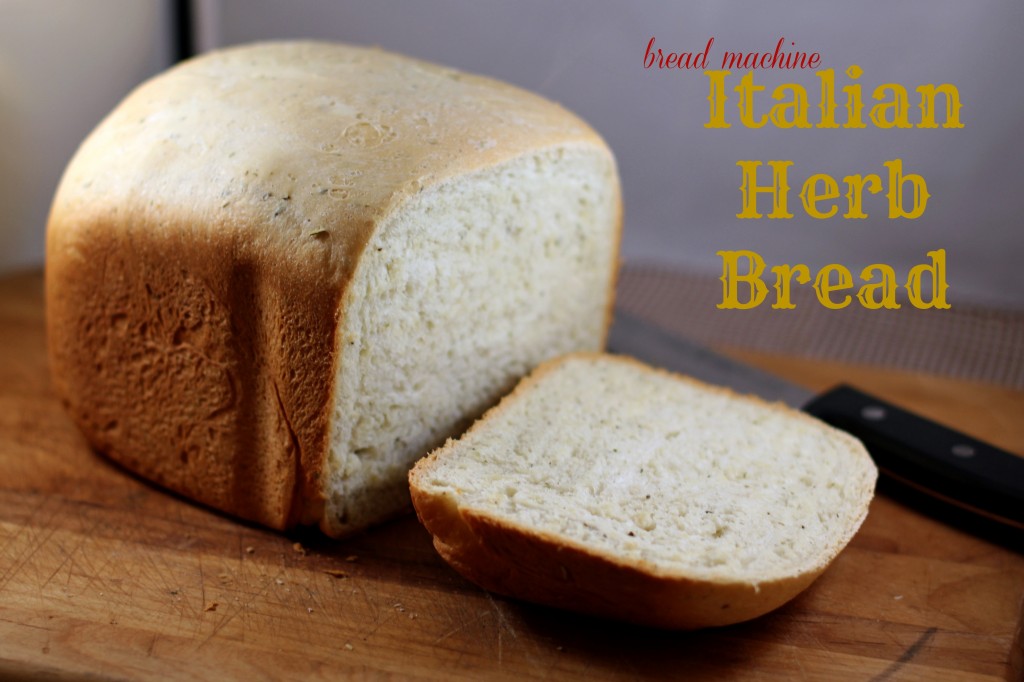
Italian Herb Bread

If you don’t have a bread machine but love fresh bread, you need to add one to your Christmas Wishlist.  Yes, it takes up a lot of room on my counter, but the smell of fresh baked bread with relatively little effort is completely worth it!

I received my bread machine for my birthday two years ago. At the time, I was still nursing my twin girls and didn’t have to worry about calorie or carb counting.  Now, I have to be a bit more aware of how much of this delicious bread I consume, but it’s still a staple recipe in our house.  I’ve made it dozens of times and it’s perfect to take with dinner to a friend post-surgery or to serve with spaghetti or lasagna on a chilly fall night.  Best of all, it’s quick and easy and requires relatively little prep, which is why it’s one of our favorites.

Italian Herb Bread
Author: 
Prep time: 
Cook time: 
Total time: 
Serves: 8
 
Ingredients
  • 1¼ cups warm water
  • 2½ Tbsp. oil
  • ¼ cup sugar
  • 2 tsp. salt
  • 4 cups bread flour
  • 2 Tbsp. dried Italian Seasoning
  • 2¼ tsp. yeast or 1½ tsp quick rise yeast
Instructions
  1. Pour all ingredients in machine in the order listed above. Set to the basic setting for a large loaf. We prefer light crust. Bread machines make this recipe extremely easy!

This recipe receives Five Wooden Spoons from my family as they all love it. Especially slathered with butter.

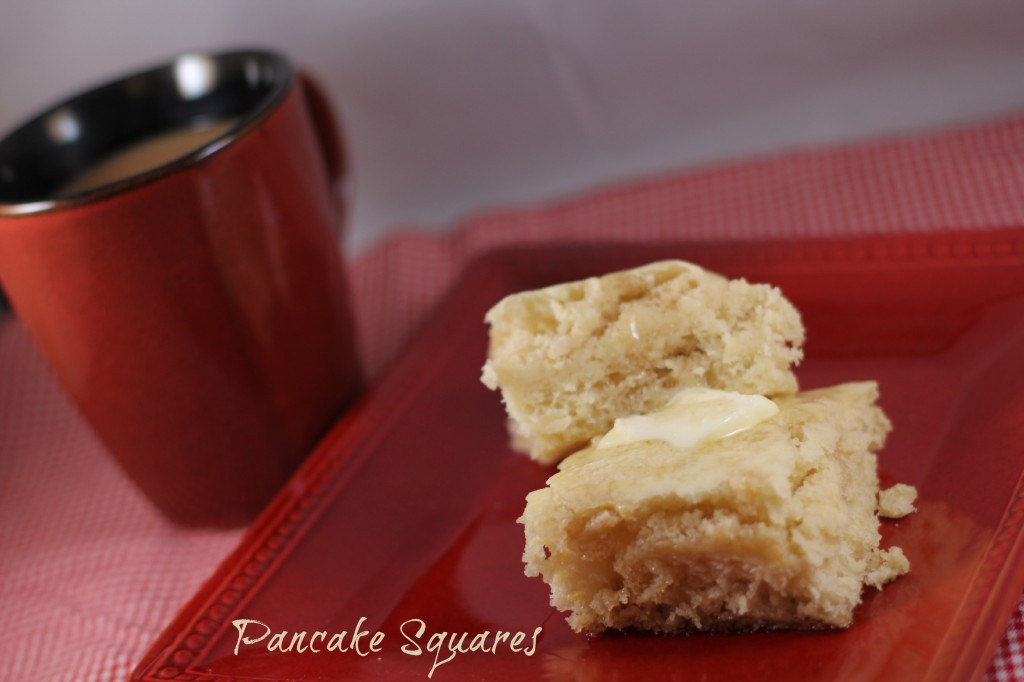
Pancake Squares

One of our new favorite breakfasts are these quick and easy pancake squares.  I originally found the idea on Pinterest and used the recipe from Big Red Kitchen.  After making them once, I quickly realized that I needed to make more to feed my growing kiddos (and if I wanted one for myself!) and adjusted the recipe with a few tweaks as well. Often, on school days, Bo would request pancakes and I’d try to steer him to something slightly less labor intensive.  It isn’t that making traditional pancakes is difficult – it isn’t – but it can be time consuming when trying to wrangle three kiddos out the door for school fully dressed and with well-packed lunches.  These square pancakes are the perfect compromise — all of the pancake flavor without having to spend 20 minutes at the stove.  I just mix up the ingredients, pour it in the pan, and while it bakes I can make the other breakfast components, finish packing lunches, and lay out their clothes for the day. Honestly, I think the taste of these pancakes is probably better than traditional pancakes.  They are fluffy and more cake-like — but with a pat of butter and warmed maple syrup, they are divine.  Bo agrees.  When I made them last week he ate four squares — and still wanted more!

Pancake Squares
Author: 
Prep time: 
Cook time: 
Total time: 
Serves: 6
 
Ingredients
  • 1½ cups skim milk
  • 4 Tbsp melted butter
  • 2 large eggs
  • 2 Tbsp honey
  • 1 tsp vanilla
  • 2 cups all-purpose flour
  • 4 tsp baking powder
  • ½ tsp salt
Instructions
  1. Preheat oven to 350. In a large bowl combine the milk, butter, eggs, honey, and vanilla. Mix well. Add salt and baking powder. Stir in flour until combined. Do not over stir. Spray 9 x 13 inch dish with baking PAM and then pour in the batter. Bake for 22-25 minutes. Cut into squares and serve with butter and syrup.

Updated to add – try these sprinkled with mini-chocolate chips before baking. Delish!

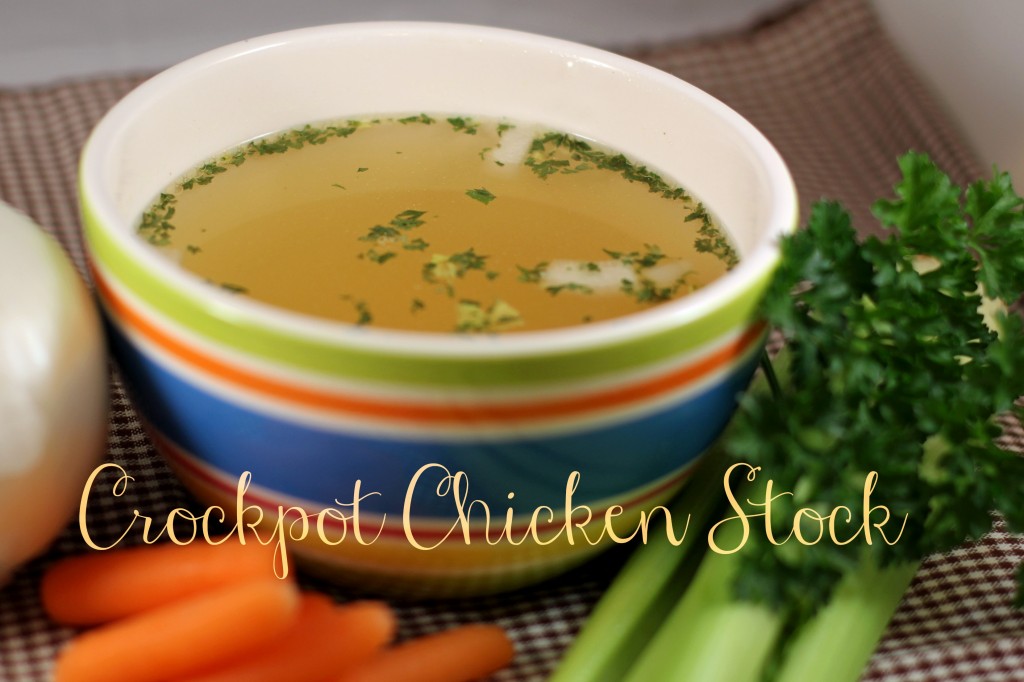
Crockpot Chicken Stock

I’ve spent the afternoon making dinner to take to one of my friends who just had her fourth child.  The primary ingredient in many of the dishes that I made (and will hopefully be sharing with you soon) is this amazingly easy, cheap, and delicious crockpot chicken stock.

Mike and I just discovered the wonders of making our own chicken stock about a year ago.  We make large batches and freeze it so we always have homemade chicken stock on hand.  I think the flavor is much deeper than the canned broth — plus it’s significantly cheaper too.  Especially for days like today when I need mass quantities!  Today I used over 10 cups of chicken stock!

The main ingredient in our stock is the carcass of a rotisserie chicken.  Every couple of weeks Mike will pick one up on his way home from work for an easy dinner.  The kids love it plain and we enjoy making wraps with the shredded meat.  Once we’ve picked it clean (or as clean as we want — we aren’t big fans of the dark meat) I throw it in the crockpot with ingredients that we always seem to have on hand and let it simmer away for a day or so before straining and freezing.  Homemade chicken stock is the base for many of my recipes.

5.0 from 1 reviews
Crockpot Chicken Stock
Author: 
Prep time: 
Cook time: 
Total time: 
Serves: 8
 
Ingredients
  • Rotisserie Chicken Carcass
  • 2-3 stalks celery, chopped
  • ½ onion, chopped
  • 8-10 baby carrots, chopped
  • 1 Tbsp olive oil
  • 2 Tbsp minced garlic
  • 2 Tbsp. parsley, dried or fresh
  • 2 cubes chicken bouillon
  • 8-10 cups water
Instructions
  1. In a large crockpot, drizzle the oil and add the chopped celery, onion, carrots, and garlic. Let simmer a bit until the veggies are warm and then add the chicken carcass, water, and parsley. Simmer on low for 10-12 hours. Strain. Stock can be used immediately or frozen.


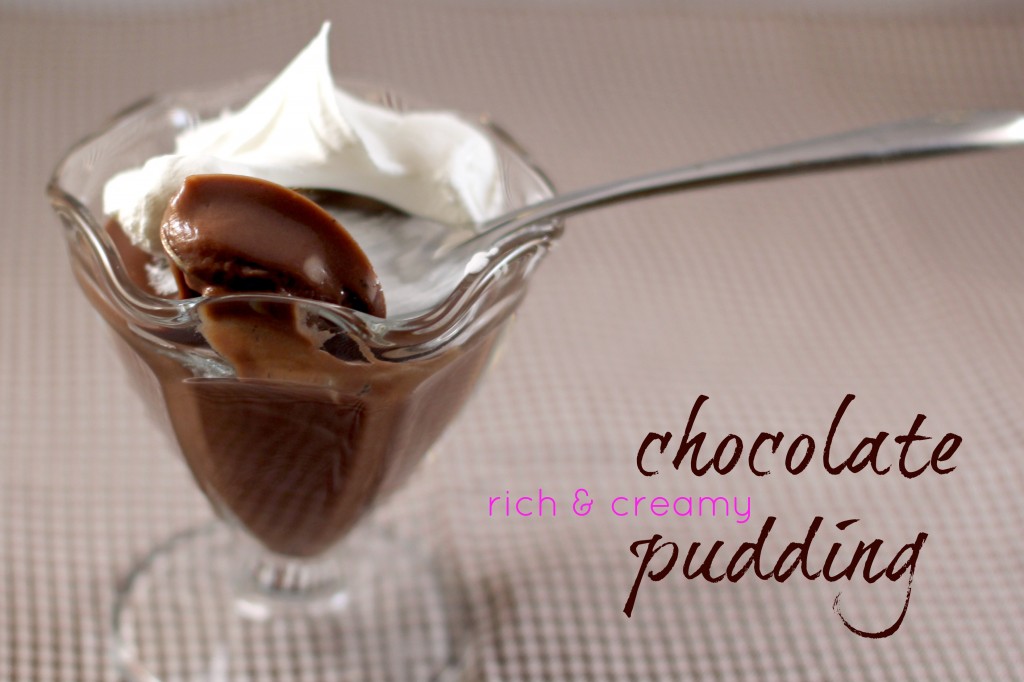
Chocolate Pudding

I’ll admit to loving the Jell-O boxed pudding. Pudding pies and pudding cups made from the Cook-n-Serve Jell-O boxes was a staple in my mom’s dessert repertoire.  However, my chocolate pudding of choice as a child was my typical breakfast when accompanying my grandpa to the local coffeeshop – a huge slice of homemade chocolate pie.  Usually he let me order a Sprite with it as well.  When I’m missing Grandpa and desire the creamy comfort of pudding, these days I generally choose to forgo the box and make the homemade version.  It reminds me of that coffeeshop pie – especially when I add whipped cream on top.

This rich and creamy version has the smooth texture of Jell-O with significantly more flavor.  While it still has plenty of sugar, the milk and eggs make this pudding protein rich and significantly less chemically than it’s Cook-n-Serve counterpart.   And truly, it’s just as quick and easy.

Bo’s not a pudding fan (neither is Mike — I find them both strange) but the girls and I enjoy the creamy goodness of this chocolate pudding — sometimes even while it’s still warm.  Anna and I made this together and she eagerly helped me lick the saucepan.  Waiting for it to cool thoroughly is the most difficult aspect of this recipe!

Chocolate Pudding
Author: 
Recipe type: Dessert
Prep time: 
Cook time: 
Total time: 
Serves: 6
 
Ingredients
  • ⅔ cup sugar
  • 3 Tbsp Cornstarch
  • 3 cups whole milk
  • yolks of 5 large eggs
  • 1 tsp vanilla extract
  • 4 oz semisweet chocolate baking bar
Instructions
  1. Whisk sugar, cornstarch, milk and yolks in a medium saucepan. Bring to a boil. Reduce heat and cook 2 minutes. Remove from heat and add vanilla and chocolate. Stir until well combined. The filling can also be used as a pie filling.
  2. The leftover egg whites are great to use for Angel Food Cake.

***I often substitute skim milk for the whole milk because it’s what we have on hand. The picture above used skim milk and it’s still amazingly rich, creamy, and tasty!***

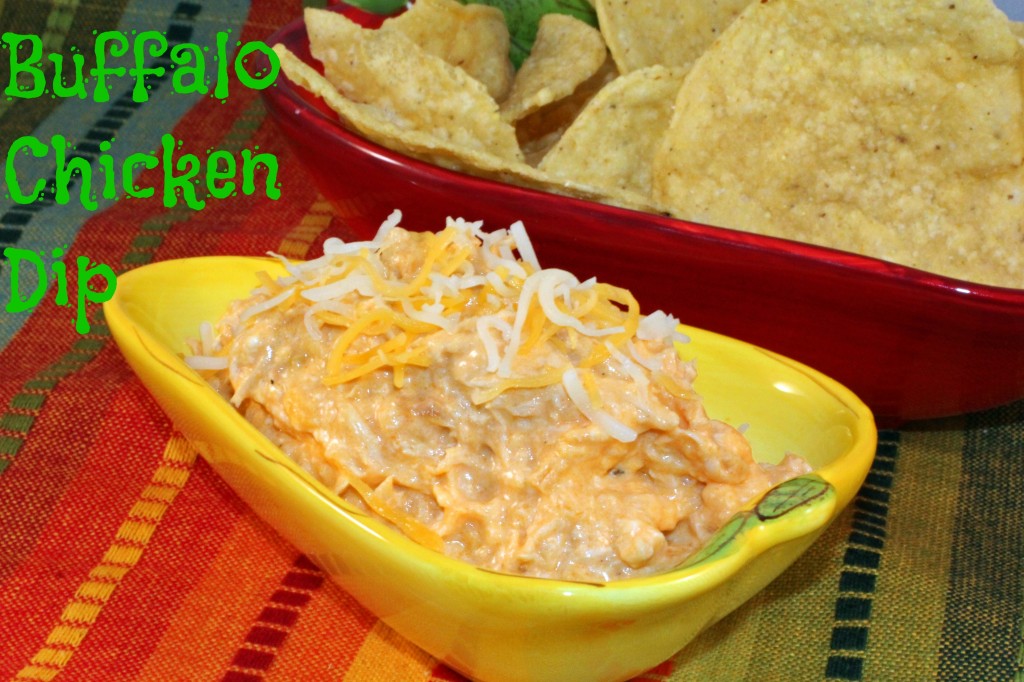
Buffalo Chicken Dip


One of the current staples in our diet right now is this tangy Buffalo Chicken Dip.  I originally made it a little over three years ago after it was suggested to me as a use for shredded chicken on Facebook.  At the time, Mike wasn’t a fan.  He thought it was too spicy, so I didn’t make it again.

However, my friend Laura had the dip at her house several months ago when we were over for one of our dinner gatherings and Mike chowed down on the stuff.  I took that as my sign to make it again.  Apparently he only likes new foods if I am not the one to make them…  But that’s an entirely different issue.

Buffalo Chicken Dip
Author: 
Recipe type: Dip
Cuisine: American
Prep time: 
Cook time: 
Total time: 
Serves: 4-5
 
Ingredients
  • 1 lb. shredded chicken
  • ¾ cup Buffalo sauce (I use Frank's Red Hot)
  • ½ cup Ranch dressing
  • 1 cup shredded sharp cheddar cheese
  • 8 oz. cream cheese, softened
Instructions
  1. I pre-shred several pounds of chicken at one time by cooking a 5 lb. bag in a large crockpot and then giving it a spin in my Kitchen-Aide. I freeze in ½ pound baggies and just pull two out when I want to make this dip.
  2. In a small crockpot, place the chicken (if still frozen, let it thaw in the crockpot for a little while first before adding the other ingredients), Buffalo sauce, dressing, cheese, and cream cheese. Stir occasionally until heated through and well combined. Serve with chips and celery sticks.

Since then, I’ve made this dip at least once a month.  It’s great for lunch, delicious as a pre-dinner snack while the kiddos are eating their dinner (Mike and I usually eat after they are in bed), and best with lots of chips while watching Bears football.  This past Sunday, we watched football at the Kilmartin’s and enjoyed a variety of Buffalo Chicken dip inspired goodies.  My girls donned their new Bears attire, which proved to be good luck for da Bears as well!

Monday Munchies: Laura’s Banana Cake

Banana Cake 2

On Saturday evening, we had two families over for dinner.  Amazing how adding only two families to our house means we are feeding a total of fifteen people!  Luckily, everyone pitches in and brings a few items to supplement the menu.  This week, Laura brought this delicious banana cake that I loved.  All nine of the kiddos devoured it in record time.  I knew this was a recipe that I’d be making in the future – both because it tastes great and because it seems like I’m always trying to find new ways to use up overripe bananas. 

The cake is very moist and flavorful and the creamy topping makes it a great spring dessert.  I’ll even admit to eating a piece for breakfast the last two mornings. It tastes great with coffee too.  🙂

Laura gave me permission to photograph her cake and share the recipe on the blog.  Thanks, Laura!!

Banana Cake

Cake:

  • 1 box yellow cake mix
  • 4 ripe bananas, mashed
  • 1 tsp baking soda
  • 2 eggs
  • 2 cups cold water

Topping:

  • 8 oz Cool Whip (lite is fine)
  • 1 cup cold milk
  • 1 small instant vanilla pudding
  • Preheat oven to 350.

Mix together the cake mix, bananas, baking soda, eggs, and water.  Spread into a 9×13 pan sprayed with non-stick spray.  Bake for 35 minutes and cool completely.  For the topping, whip together the Cool Whip, milk, and instant pudding.  Spread on top of the cooled cake.  Refrigerate.  Laura said that this is the type of cake that becomes even better after it’s aged a few days and having just had another piece this morning, I will say that I agree!

Banana Cake 1

I’m hoping my food photography starts to improve soon.  My Mother’s Day gift was two books I’ve been eyeing on Amazon regarding Food Photography.  Looks like I’m going to have to invest a bit for the proper lighting, etc. but hopefully I can figure out the trick to making the food look extra yummy – and the plates look less blue – in the near future!

Each Monday, I’ll showcase a family and kid-friendly recipe to share with your family. Please let me know if you try one of my recipes! Enjoy!

Monday Munchies: Menu Planning

Menu plan

I was recently asked about how I plan our meals so I thought I would share here – both for my friend that asked – and for anyone else who is interested.  First, a disclaimer:  we do not always eat all of the meals I plan for the week.  Life happens.  T-ball practice gets cancelled so we decide to eat after the kids.  Mike comes home and suggests we take the kids to Delaney’s.  Whatever I have planned just doesn’t sound good.  You get the idea… 

Each week, usually on Saturday or Sunday morning, I look over our schedule for the week and send Mike an email that outlines everything we have going on that week – for both sanity and so I don’t have to repeat myself a million times throughout the week.  Once I know what our schedule looks like, I make the meal plan for the week.  Crockpot and easy meals when I suspect Mike will be home late or there is an afternoon activity on the schedule such as a playdate, t-ball, etc.  Usually, I take whatever meals we didn’t manage to eat the previous week and automatically assume we will eat them the following week. 

We keep a running grocery list of items needed on the counter next to the stove.  As we run out of staple items, I put them on the list.  There is always something on the list – usually within minutes of returning from the store!  I don’t plan out specific breakfasts or lunches for the week.  For breakfast, the kids typically choose some combo of leftover waffles from the freezer, cinnamon bread toasted, bananas or other fruit, smoothies, cereal, eggs, or oatmeal.  We always have these items on hand.  For lunches, it’s basically another short list – fruit, yogurt, string cheese, peanut butter and jelly, peanut butter crackers, cheese and crackers, grilled cheese, leftovers, and just basics that we have on hand.  I will need to be more organized for lunches next year as all three kiddos will be taking their lunch to preschool. Today, they had half of a kiwi, carrot shreds, a piece of string cheese, fresh banana bread with butter, and milk.

Banana Bread Lunch

The meal plan above is for this week and I went to the store yesterday afternoon to pick up the items needed (Mike usually goes at least once during the week too).  Tonight, after the kiddos go to bed, Mike and I will have cashew chicken, rice, and a veggie (probably broccoli).  The kiddos are having pasta, yogurt, watermelon, and a veggie.  On Tuesday, we’ll eat together early since Bo has t-ball.  On the agenda is crockpot pizza, breadsticks, and salad.  And so it goes.  We are having friends over on Saturday night, so I have a few extra items on the list and Sunday has become our pizza and movie night, so that evening stays pretty consistent.  Typically we have pizza and strawberries. 

You’ll notice on my menu plan there is also an area I labeled “Other”.  If I know I’m making a snack for a playdate, baking something, or trying something new, those usually go in the “other” column.  Mostly so I won’t forget to make them after I’ve picked up the ingredients.  I made banana bread with some older bananas this morning.  I’m also planning to make avocado fries this week (probably with regular fries as well on Wednesday with our tuna bunwiches) that I found on Pinterest.  Where else?  Last week, I baked several times for playdates.  These extras vary each week.  If I know I need to make a batch of waffles for breakfast one morning, I usually add that here too.

I’m not sure if this is really helpful or not.  Mostly, I just try to keep a running list of items we need and at least have a plan of some type so it isn’t 5:30 and I have no idea what to cook.  Having the list on the wall in the kitchen (inspired by Pinterest, of course) also helps me to remember to put meat out, start crockpot meals, etc. in the morning. 

How do you meal plan for your family?  Do you write out all meals or just plan dinner?  Any tips or tricks to share?

Monday Munchies: Three Spoon Banana Bread

Three Spoon Banana Bread 4 Three Spoon Banana Bread

Three Spoon Banana Bread 3 Three Spoon Banana Bread 2

We made this bread for dessert last Wednesday (we added chocolate chips) and I didn’t manage to take any photos of the final product.   This recipe originally came from a blog friend, but I’ve modified it slightly.  All three of the kids love this bread and it’s a great way to use up ripe bananas.  As you can see, Bo, Clara, and Anna all love to help cook.  After I had poured the batter into the pans I let them use their spoons to lick the remaining batter.  They were in Heaven.

Banana Bread

  • 1 1/2 C sugar
  • 3/4 cup applesauce
  • 3 eggs, beaten
  • 1 tbsp vanilla
  • 5 med very ripe bananas, mashed
  • 1 1/2 tsp baking soda
  • 3 C flour (I use 2 cups all purpose and 1 cup whole wheat)
  • 1 tsp salt

Combine all ingredients and mix well. Bake for about 60 minutes at 350, test with toothpick in center. It’s also good if you add some chocolate chips in the batter, or walnuts if you desire!

Each Monday, I’ll showcase a family and kid-friendly recipe to share with your family.  Please let me know if you try one of my recipes! Enjoy!

Monday Munchies: S’more Truffles

Smores bites 3

This recipe was inspired by a photo on Pinterest that linked to this recipe. I changed the recipe slightly and it was a huge hit with the trio.  I took these outside after nap on Friday and they all loved them.  Definitely something I’ll be making again!

S’more Truffles

  • 5 graham crackers, broken up into large chunks
  • 1/3 cup creamy almond butter
  • 1/4 cup chocolate syrup
  • 2 Tablespoons wheat germ
  • 2 Tablespoons flax seed
  • 3 tablespoons agave nectar
  • 20 miniature marshmallows.
  • 1 small package of almonds (pulsed finely in a food processor)

Combine all ingredients in a food processor except for the marshmallows and almonds.  Pulse until a dough-like mixture forms.  If needed, add more syrup or wheat germ to adjust the consistency of the dough so it can easily be rolled into balls.  Flatten each ball, place a marshmallow in the center, and then roll into a ball.  Roll in almond pieces and refrigerate for at least 30 minutes.  Makes approximately 20 truffles.

Oh yeah – and I took this photo using my other new love – Instagram.

Clara Anna Smore Bites